- Em promoção!
- -4,60 €


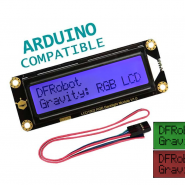
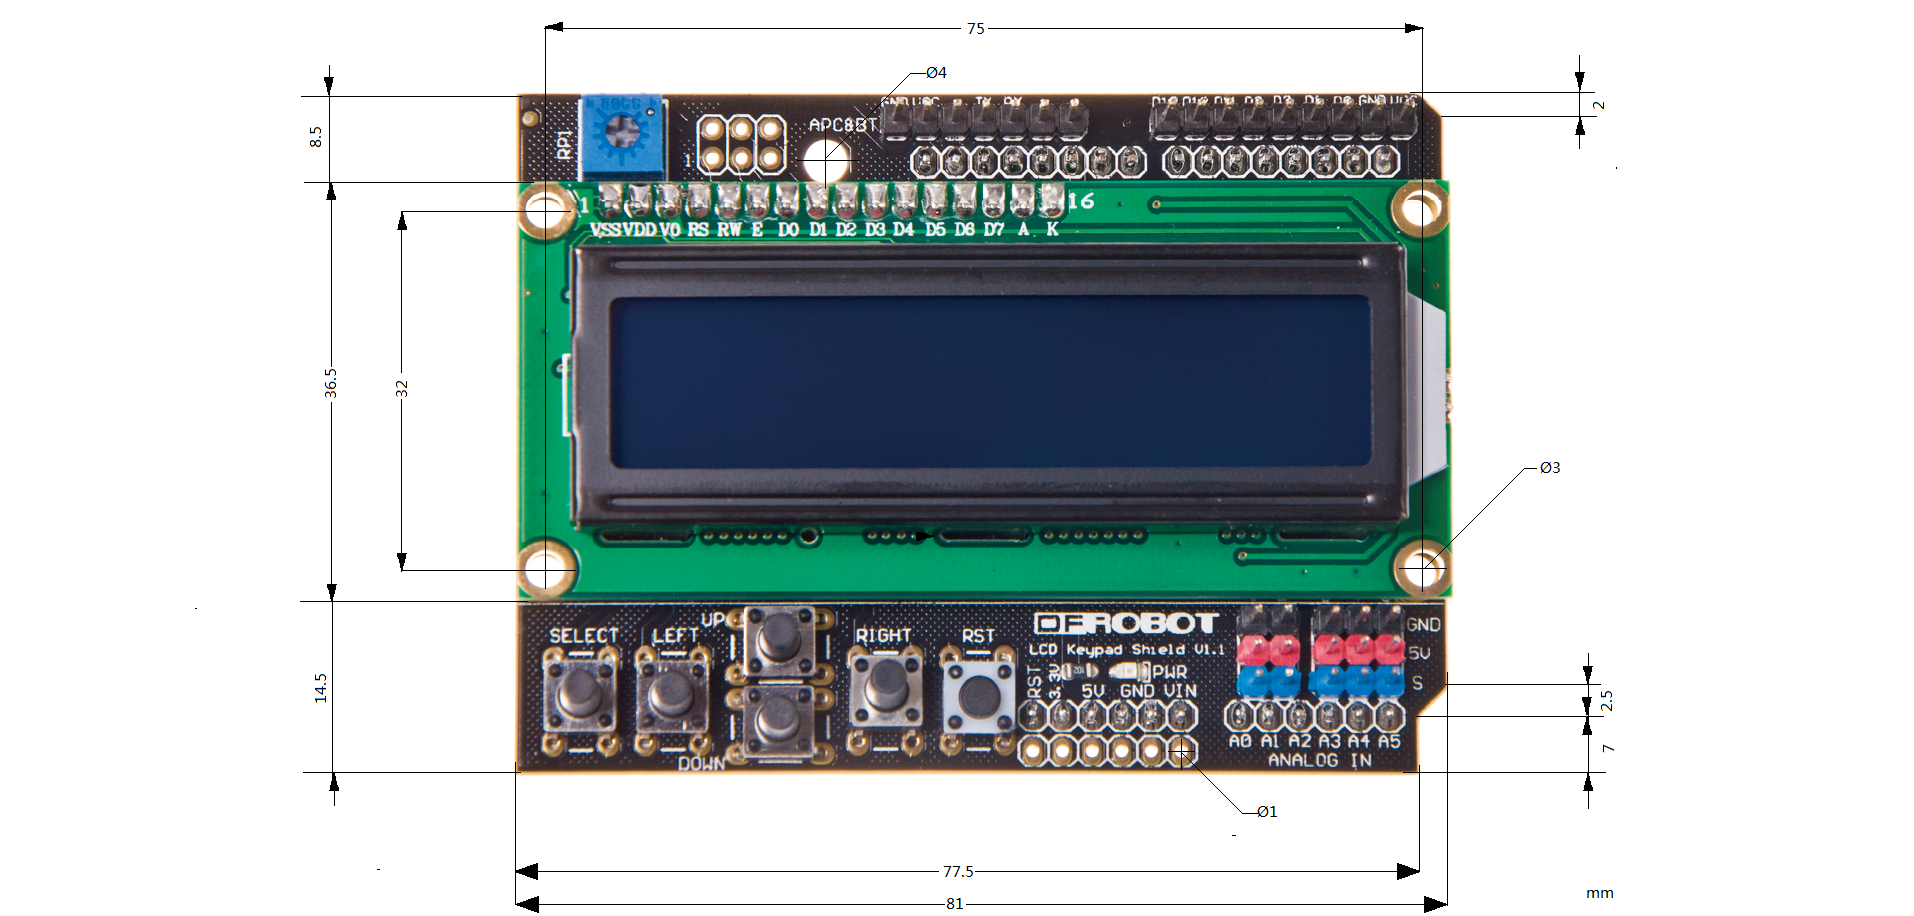
Shield para Arduino com LCD 16x2, com ajuste do contraste e 6 botões de pressão que apenas utilizam um pino analógico A0 do arduino!
This is a very popular LCD Keypad shield for Arduino or Freeduino board. It includes a 2x16 LCD display and 6 momentary push buttons. Pins 4, 5, 6, 7, 8, 9 and 10 are used to interface with the LCD. Analog Pin 0 is used to read the push buttons. The LCD shield supports contrast adjustment and backlit on/off functions. It also expands analog pins for easy analog sensor reading and display.
The LCD Keypad shield is developed for Arduino compatible boards, to provide a user-friendly interface that allows users to go through the menu, make selections etc. It consists of a 1602 white character blue backlight LCD. The keypad consists of 5 keys — select, up, right, down and left. To save the digital IO pins, the keypad interface uses only one ADC channel. The key value is read through a 5 stage voltage divider.

LiquidCrystal(rs, enable, d4, d5, d6, d7)
Creates a variable of type LiquidCrystal. The display can be controlled using 4 or 8 data lines. If the former, omit the pin numbers for d0 to d3 and leave those lines unconnected. The RW pin can be tied to ground instead of connected to a pin on the Arduino; if so, omit it from this function's parameters. for example:
LiquidCrystal lcd(8, 9, 4, 5, 6, 7);
lcd.begin(cols, rows)
Initializes the interface to the LCD screen, and specifies the dimensions (width and height) of the display. begin() needs to be called before any other LCD library commands.for example:
lcd.begin(16, 2);
lcd.setCursor(col,row)
Set the location at which subsequent text written to the LCD will be displayed. for example:
lcd.setCursor(0,0);
lcd.print(data)
Prints text to the LCD.for example:
lcd.print("hello, world!");
lcd.write(data)
Write a character to the LCD.
More function can see:
Plug the LCD Keypad to the UNO(or other controllers)
Temperture sensor: S(blue) -- A1()
Note: A0 has been occupied.
VCC(red) -- VCC
GND(black) -- GND
Tricks for changing sensor cable pin mapping

| Q&A | Some general Arduino Problems/FAQ/Tips |
|---|---|
| Q1 | I do not understand your schematic. There are too many connectors illustrated than are actually on the shield. Could you show me a mapping? |
| A1 | The J1-J8 include the both the user interface, i.e. Analog pins, APC220(Serial) pins, Digital pins, and the pins connected with the lower Arduino card, e.g. Uno/ Leonardo. Here is a simple mapping picture. |
| Q2 | Why my LCD keypad cannot display anything on the Intel Edison while all right on Romeo? |
| A2 | It works well if uploaded by Arduino 1.5.3 version, however, the latest 1.6.* have discard pin Definition for Edison. So you have to add pinMode(); into the setup() like this: |
void setup() {
  for(int i=4;i<10;i++){
  pinMode(i,OUTPUT);
  }
  lcd.begin(16, 2);  // set up the LCD's number of columns and rows
}
/*******************************************************

   Description:
   Reads an analog input on pin 1, prints the result to the LCD.
   This program takes the temperture sensor LM35 for example.

   Connection:
   Plug the LCD Keypad to the UNO(or other controllers)
   Temperture sensor:
   S(blue) -- A1()
     Note: A0 has been occupied.
   VCC(red) -- VCC
   GND(black) -- GND

********************************************************/

#include <LiquidCrystal.h>

LiquidCrystal lcd(8, 9, 4, 5, 6, 7);        // select the pins used on the LCD panel

unsigned long tepTimer ;

void setup(){
    lcd.begin(16, 2);                       // start the library
}

void loop(){
    lcd.setCursor(0, 0);                   // set the LCD cursor   position
    int val;                               // variable to store the value coming from the analog pin
    double data;                           // variable to store the temperature value coming from the conversion formula
    val=analogRead(1);                     // read the analog in value:
    data = (double) val * (5/10.24);       // temperature conversion formula

    if(millis() - tepTimer > 500){         // output a temperature value per 500ms
             tepTimer = millis();

             // print the results to the lcd
             lcd.print("T: ");
             lcd.print(data);
             lcd.print("C");
     }
}

Produtos Associados
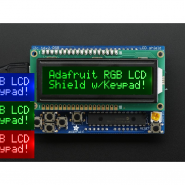

Shield para Arduino com LCD 16x2, com ajuste do contraste e 6 botões de pressão que apenas utilizam um pino analógico A0 do arduino!