
This device measures whether or not sound has exceeded a threshold, you’re basically left with determining what it is you want to do. What I mean by this is that you can do something when it is quiet and/or you can do something when it is loud.
If you have any questions on this product please feel free to contact us.
*Disclaimer: The images are merely illustrative.
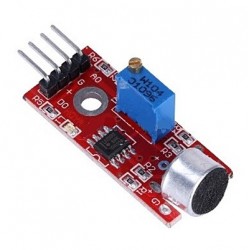
The electret microphone is a type of condenser microphone. Condensers are essentially capacitors and condenser microphones are formed by a thin diaphragm mounted in front of a plate. Recall that a capacitor is formed by two conductors with an insulator, or dielectric, between them. Both the diaphragm and the plate are conductors. The smaller the distance between these two conductors, the higher the capacitance, given that the surface area of the conductors are unchanged.
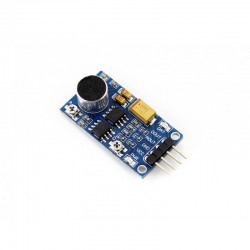
When sound reaches the condenser, the diaphragm vibrates thereby changing the distance between the conductors and effectively changes the capacitance between the diaphragm and the plate. This capacitance is converted to voltage with the application of a sufficient charge on the condenser. The voltage is boosted through a built-in transistor inside the microphone as shown in the picture above.
Now condenser microphones needs high voltages to maintain that charge. An electret microphone doesn’t need high voltages because the diaphragm is made out of a special material that stores a high enough charge. This material, which is the electret, is like a permanent magnet but stores a permanent charge.
The voltage changes that are produced by sound should be enough to be detected by an Arduino. This is why sound sensors often always have an operational amplifier IC included. For my Grove Sound Sensor board, the LM358 is the op-amp.
Since the sound sensor board produces a changing voltage, we’ll need the Arduino’s analog-to-digital converter to process that voltage. Here’s a sketch that reads the voltage from the sound sensor connected to A0 which is then displayed on the Arduino IDE’s serial plotter.
int soundPin = A0;

void setup()
{
  Serial.begin(115200);
}

void loop()
{
    long sum = 0;
    for(int i=0; i<100; i++)
    {
        sum += analogRead(soundPin);
    }

    sum = sum/100;

    Serial.println(sum);

    delay(10);
}
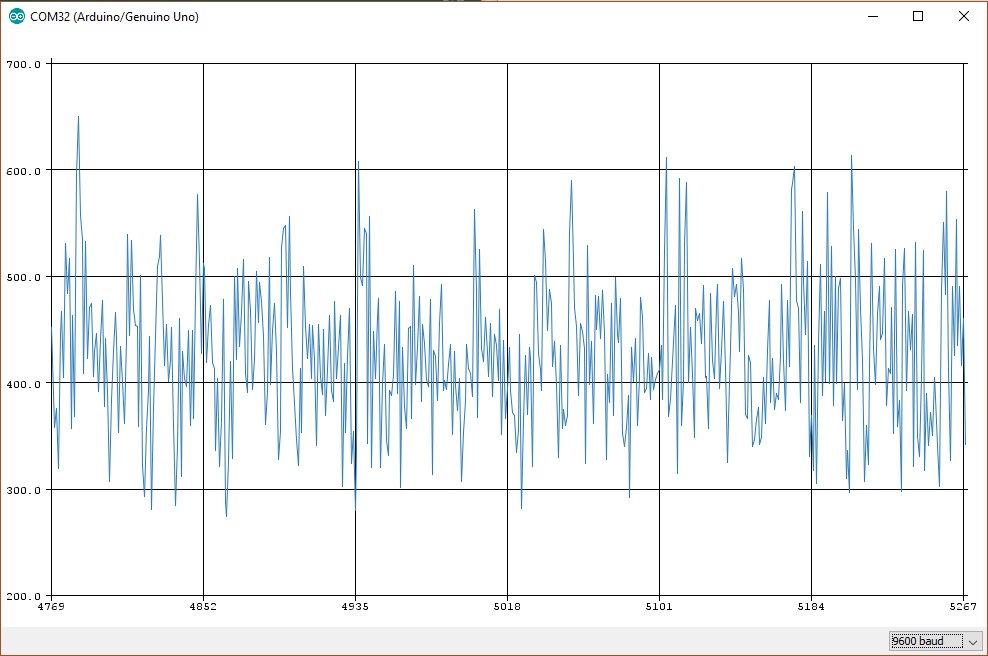
The sound sensor board outputs a noisy voltage so we need to take the average of a hundred samples to be more definitive. Then again, it is still noisy as shown by the serial plotter:
This is expected as sound can never be a straight line graph. What we can only deduce from this data is the peak value when there is a loud sound.
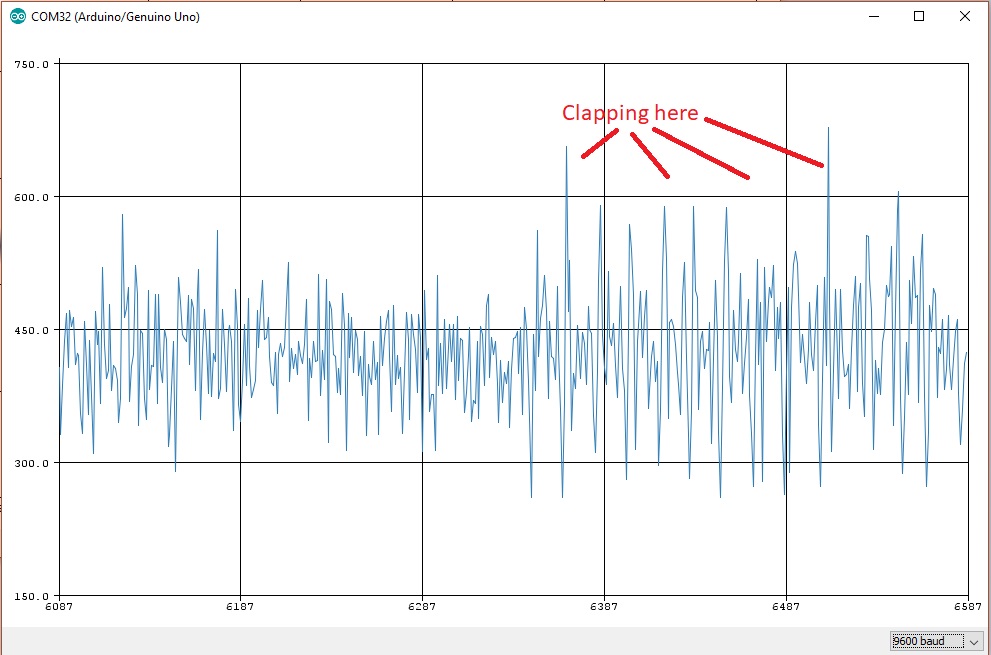
For example, the values hover around 300 to 500+ based on the graph above. But when I clap, this shows:
I can now use this data to create a simple clap switch. Here’s the modified sketch:
int soundPin = A0;
int LED = 13;

void setup()
{
  Serial.begin(9600);
  pinMode(LED, OUTPUT);
}

void loop()
{
    long sum = 0;
    for(int i=0; i<100; i++)
    {
       sum += analogRead(soundPin);
    }

    sum = sum/100;

    if(sum > 600){
      digitalWrite(LED, HIGH);
    }else{
      digitalWrite(LED, LOW);
    }

    Serial.println(sum);
    delay(10);
}
I added a LED that will turn on everytime the sound sensor picks up a loud enough sound, like clapping. Otherwise, it stays off.

Related products


This device measures whether or not sound has exceeded a threshold, you’re basically left with determining what it is you want to do. What I mean by this is that you can do something when it is quiet and/or you can do something when it is loud.